Background Hockey Prep
We can list and work on all of our game’s skills, and we can design the fanciest playing system in the world. Still, there’s so much more that goes into a successful season, including what I’ll refer to here as all the “background hockey prep”…
Okay, so just what do I mean by background hockey prep? Well, I’m going to lump a bunch of things into this category, mainly with the idea of helping things run smoothly — in our practices, in our games, and in any other areas that might determine my youngster’s or my team’s success.
As intimated above, I’m not talking about skills, but I will be talking about things that should help me develop skills better or accomplish them more effectively. Same thing for working on other parts of our game — like teaching the X’s and O’s better, or like getting our strength, speed or conditioning done more effectively.
A funny — or maybe not so funny — thing… This so-called background hockey prep is something the more dedicated coaches, parents and older players will tend to do on their own — maybe without thinking, while the masses often look to take shortcuts. Guess who succeeds in the end, however.

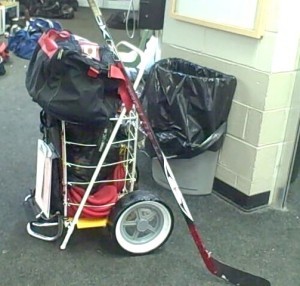
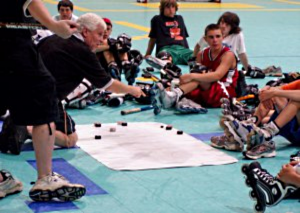
Just one example of what I mean is something like my equipment cart (shown above). When I started using one a couple of decades ago, I got an awful ribbing. Over recent years, however, I knew more folks were appreciating my use of one, and I even started noticing other coaches toting their own versions through rink lobbies.
How did that cart come about? Plain and simple: I started doing more and more background hockey prep, and consequently realized I needed far more gear to get things done effectively. As an example, I’ve seen coaches walk through a rink lobby and towards the ice with a small bag of pucks that couldn’t have numbered more than a dozen. Not this old coach. My hockey bag carries between 70 and 80 pucks, that I dump out completely whenever my players are going to puckhandle, pass or shoot. Just think about it: I don’t want a single player wasting a second searching for a puck while my ice-time is ticking away at dollars-per-minute. Nor do I want the flow of my drills to stall.
Speaking of saving precious time… A number of years ago, one of my assistant coaches arrived at an awesome idea, suggesting we raise the backs of our nets during shooting drills, so that pucks shot along the ice would exit the backs of those nets. A couple of weeks of fiddling in my home workshop resulted in two sets of rubber “Net Blocks” that henceforth hung at the ready on my cart. (If you can envision them: these were simply composed of a pair each of rubber wedges attached by about a foot of rope. The point of each wedge facing towards the shooters were hardly ever hit dead-on, while the rope kept them in pairs and made them easy to hang anywhere.)
Yet another assistant once suggested some great games our team could play at the ends of our practices. Those games required a number of differently colored pucks, which thereafter hung from my cart in a small net bag.
So did I eventually carry spray paint and a box of thick chalk, so I could either mark the ice or a lockerroom floor when doing so would help me teach better.
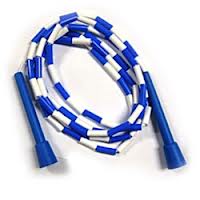
For a lot of years I carried a bag containing enough long jumpropes so that my entire team could work in threes. Just jumping that rope on the ice is a real challenge, but so is dribbling a puck at the same time.
Actually, my practices always included some off-ice/lobby exercises to be done as my players waited for practice to start. Much of the time, players had access to Swedish stickhandlng balls that also dangled in a net bag from the side of my cart. And that cart also contained a zip-lock bag filled with small balloons, that are awesome for dribbling in the air and encouraging stick dexterity.
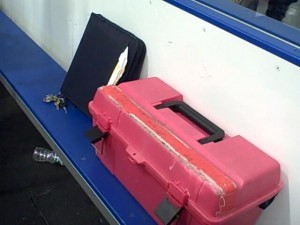
Thankfully, that cart had enough extra space to accommodate special training aids I’d choose to bring to the rink on a given night. It also could hold my “Murphy’s Law Kit”, which contained all the little things that would save a player from missing a shift or even a whole game — from a skatestone to extra laces to an extra neckguard to extra helmet screws and all the tools necessary to fix a piece of gear.
Then, I’m thankful for usually having a pretty good relationship with rink managers and ice-makers wherever I worked. And, that helped me greatly when it came to storing gear that was too big or cumbersome to lug from rink to rink. My SMGs really helped my teaching, and so did my Tow-trainers, both good examples of equipment I was able to safely leave at the rinks.
Oh, and get this… I used to have twenty large, expensive pylons I didn’t want stolen (or laying all over a rink when I really needed them). So, I chained them together, and stored them at the rink where I taught most often.
Over later years, though, my teams practiced at three different on- and off-ice facilities. Of course, most rinks do have cones available. If there’s a problem, it’s as I suggested above, in that they’re too often scattered all over the place, and not always available when we need them. So, don’t you know, I started carrying my own “Dots” in my cart. I actually had these 10″ across foam circles made, complete with my logo on them.
Hopefully members are now understanding the benefits of me spending considerable time on background hockey prep. I mean, just picture the difference between what I got accomplished during a couple of hours at a rink, in comparison to the guys who walked in to run a practice with a dozen or so pucks and not much else. (For shame. For shame.)
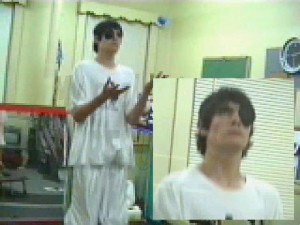
Not done yet, I need to remind members that every group of humans includes individuals with different learning preferences (see two previous posts). In other words, some of us are believed to absorb information better through hearing, some seemingly do better seeing new info, and some feel they do better engaging in a conversation about the new information. With that, I rotated different teaching aids into my gear cart. Oh, I know some coaches get stuck with the constant use of a greaseboard. And, while I’ve also used one often, I as often used a Soviet-inspired Model Rink with little moveable men.
Things didn’t stop there, however. No, in order to better teach the game’s X’s and O’s, I also created a team website where I hosted many of the game play videos you see here on CoachChic.com.
This concept of doing some in depth background hockey prep led me to add a weekly segment to our off-ice practice I eventually referred to here as a “bull session”. This is where I’d often use my Model Rink (shown above), with the subjects for this 15- to 20-minute session coming from the notes I’d gathered during the past week’s game/s. As members might imagine, my players got pretty smart, a lot stemming from the time I put into our studying the game’s X’s and O’s, and a lot from their being exposed to all the information in so many different ways.
Many of the things my teams have done towards enhancing their special physical traits were also enhanced by my efforts behind the scenes. For sure, I spent plenty of time studying how to increase areas like my kids’ speed, agility, power, and conditioning. Make no mistake about it, however, that these qualities often required extra equipment.
Ya, I’m talking about it taking a lot of extra time and effort to gather whatever was needed to help my players get better. Some gear I’d buy, but some I’d make. If others haven’t considered this yet, let me say that one of any given training gadget isn’t much good when it comes to running a team practice. I mean, can you imagine fifteen or more players standing in line for their chance at a single piece of gear? No, four or five training gadgets get us closer to hockey’s work:rest ratio of 3:1 or 2:1. Sometimes, though, a piece of equipment (like our radar gun) is so expensive that we probably can’t purchase four or five of them. So, in that case, I’d still create four or five lines, and use other gadgets in the extra lines.
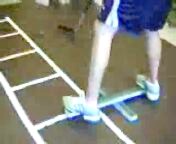
For the above reason, I made our four Tow-trainers. I made our agility ladders, mainly because I wanted ones sturdy enough to use off and on the ice, and to withstand being stepped on my skates. I had both homemade and professional speed chutes, and the same goes for the bungee cords we used, while I bought sandbags and filled them with sand for interesting strength work.
Lacking the memory to describe every training device I’ve ever used, I’ll suggest that I’ll eventually show many unbelievable gadgets in the future that were aimed at both getting the intended job done, while also exciting players into giving more of themselves.
And, that last sentiment might be the best place to end for today… For, part of what my background hockey prep led me to was gear and training ideas that would both get the job done and excite my players.
It’s funny, but when I wrote those words, I immediately thought of a couple of coaches I had as a young guy. Why did they come to mind so easily? It’s because they were far, far ahead of the proverbial curve. I mean, they didn’t become memorable by accident. No, one traveled extensively to study under high level coaches, and then brought all he learned back to my teammates and me. The other was my dad, who was an incessant reader and a deep thinker, ultimately providing me with training gadgets that others wouldn’t see for another two generations. Nowadays, I’d like to think that some of my old players will someday consider me as one of their most memorable coaches. And, I’m also hoping that the parents and coaches reading all this will also someday be so memorable.

Finally, the reason I’ve made such a big deal out of this subject is because it’s not the kind of thing that can usually be adequately done on the day of a practice. No, most of what I mentioned above takes an awful lot of thinking, planning, and more.
PS: I failed to mention that my coaching clipboard also hung from my equipment cart. I know that coaches more recently like to use phone apps and other computer generated programs for their lesson plans. My style, however, had me create a wire hanger for the clipboard, so I could hang my practice outline from the glass near mid-ice. I also failed to mention how much effort was put into preparing our goaltenders better than anyone else. Part of the reason I didn’t feel comfortable listing their extra training exercises or gadgets is because I usually loaded things in response to my goalie coach’s request. Thankfully, however, a lot of those ideas (like seen below) will gradually be shown in special posts about The MOTION Lab.